Hello, I’m Fany Becerra, the designer behind Catalú Knits, and today I want to share with you a project that was born from the heart and has been very special to me.
This collaboration had a beautiful purpose: to create a unique design for Mother’s Day. From the very beginning, I knew I wanted this project to convey the warmth, tenderness, and strength that embody motherhood, as well as the love this occasion represents.
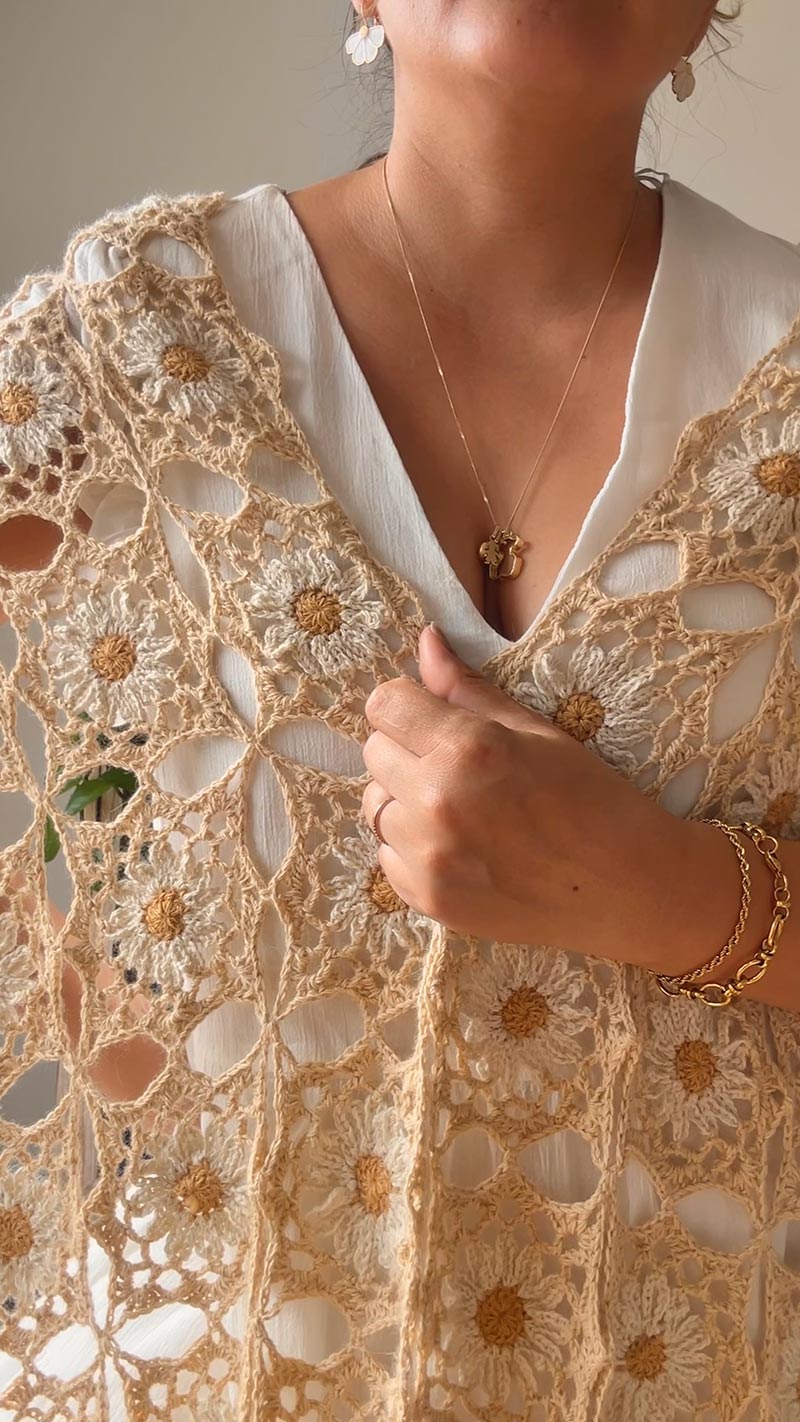
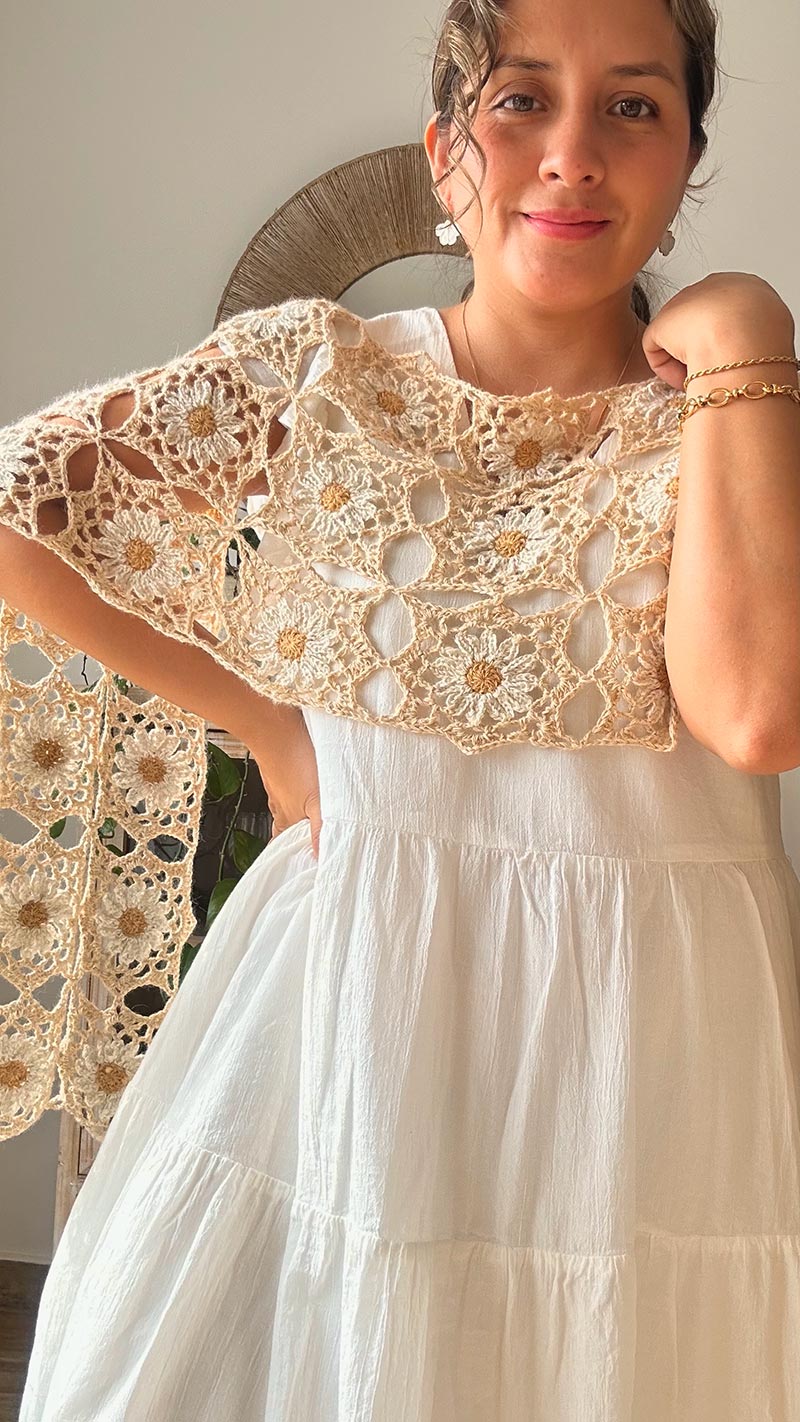
That’s how the Margareth Rectangular Shawl was born—a delicate design full of meaning, conceived as a tribute to all the mothers who weave life with love.
To create it, I worked with Puna Light, a 100% baby alpaca yarn with a soft texture, lightness, and spectacular drape. This material allowed me to design freely and to bring in that cozy, loving feeling I had envisioned from the start.
I chose three colors for this design: two of them represent the tones of a daisy—a flower symbolizing purity, simplicity, and unconditional love. The third color was essential for building the structure of the project, as I used it as the base for the iconic granny squares, which, when joined together, bring the final shape of the shawl to life.
SKILL LEVEL: Intermediate
MATERIALS:
Puna Light:
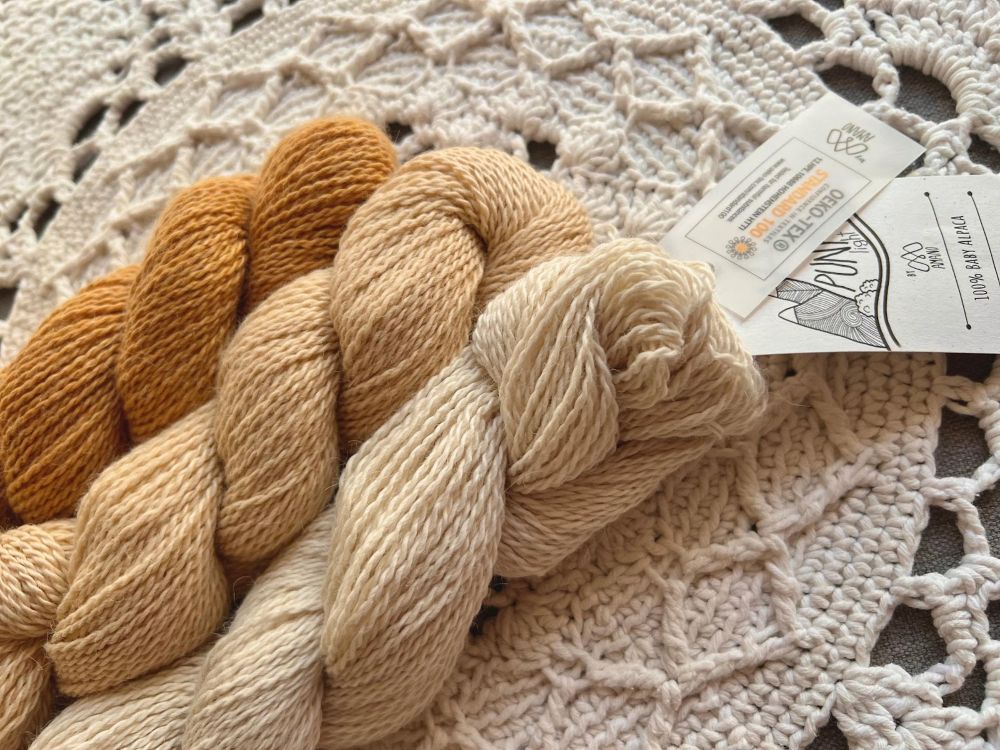
50 grams - 125 meters / 136 yards
- Color A: Peach Buzz 2806 – 1 skein (flower center)
- Color B: Cantaloopy 2819 – 2 skeins (petals)
- Color C: Coconut Craze 2807 – 3 skeins (granny square background)
- 3 mm crochet hook
- Scissors
- Tapestry needle
FINISHED MEASUREMENTS
Width: 30 cm
Length: 150 cm
CONSTRUCTION:
An important detail of this design is that the granny squares are joined as you crochet, making the process much smoother and more harmonious. You won’t need to sew them together one by one afterward, as the motifs are connected during the final round of each granny square. This also keeps the overall texture light and continuous throughout the piece.
The shawl is made up of motifs (granny squares). The design consists of 45 granny squares arranged in columns of 3, which are joined together during the last round of each square.
LET'S GET STARTED:

Color A – FLOWER CENTER
Magic Ring
Chain 3 (counts as first double crochet).
Make a total of 12 double crochets.
Join with a slip stitch. Chain 1 to secure the work, then cut the yarn.
Color B – PETALS
Join new yarn to the work.
Chain 5,
Make 1 treble crochet in the same stitch,
Chain 5 and slip stitch into the same stitch.
Chain 5, treble crochet in the next stitch, chain 5, slip stitch into the same stitch.
Repeat from * to * until the end.
You will end up with 12 petals.
Chain 1 to secure, then cut the yarn.
Color C – GRANNY SQUARE
ROUND 1: Work only into the treble crochets from the petals.
Join yarn to the work.
Single crochet + chain 5
Repeat until the end.
At the last petal, after the final single crochet, close the round like this:
Chain 2 + 1 double crochet into the first single crochet you made.
This places you in the center of the next chain space.
ROUND 2: Work only into the centers of the chain spaces from the previous round.
Chain 1 (does not count as a stitch),
1 single crochet,
chain 5,
1 single crochet into the next chain space,
chain 5,
1 double crochet + chain 5 + 1 double crochet (this makes a corner) into the next chain space,
Repeat from * to * until the end, creating the 4 corners of the square.
To finish the round, work 2 chains + 1 double crochet into the first single crochet of the round.
ROUND 3: Work only into the chain spaces.
Chain 1 (does not count as a stitch), 1 single crochet.
In the next chain space: 3 double crochets + chain 3 + 3 double crochets.
In the next chain space: 1 single crochet.
In the corner space: 3 double crochets + chain 6 + 3 double crochets.
Repeat until the end.
To finish, join with an invisible join using a tapestry needle.
JOINING THE GRANNY SQUARES
Start by making one complete granny square. From the second square onward, join each square during the final round—specifically, when chaining, that’s where you’ll connect it to the other square.
This process is explained in the video to ensure you feel confident and clear.
FINISHING TOUCHES:
• Carefully weave in all loose ends using a tapestry needle, ensuring they are secure and discreet.
• Block the shawl so the granny squares take on their correct shape, the stitches are defined, and the overall look is even and professional. This step will make a big difference in the final appearance of your shawl.
SUGGESTION:
If you want your shawl to be wider, simply get one additional skein of the third color (used for joining) and add one more row of granny squares to the width. It’s an easy way to customize the design to your preference!
Thank you for joining me in this very special process. Designing the Margareth Rectangular Shawl has been a journey full of emotion, inspiration, and love. I’m so happy to share it with you, especially on such a meaningful occasion as Mother’s Day.
I hope that as you crochet it, you feel the same joy and care that I did while creating it.
Let’s keep reading and stitching together.
With all my love,
Fany
Catalú Knits
Tutorial link:https://www.youtube.com/watch?v=AwjtLEWZG6I